1.原理
对上下左右等八个方向进行采样,然后对alpha值进行累加
在阈值以内的,那就是接近图片的边缘。
因为图片从透明区域到实体内有一个过渡。
2.代码
注意这里还是使用透明颜色混合的指令即:
Blend SrcAlpha OneMinusSrcAlpha
这个表示,混合渲染队列,放在Transparent层。
Tags { "Queue" = "Transparent" }
完整代码如下:
Shader "Custom/OutLine2D"
{
    Properties
    {
        _MainTex ("Texture", 2D) = "white" {}
        _OutlineColor ("OutlineColor", Color) = (1, 1, 1, 1) //描边颜色
    }
    SubShader
    {
        Tags { "Queue" = "Transparent" }
        Blend SrcAlpha OneMinusSrcAlpha
        LOD 100

        Pass
        {
            CGPROGRAM
            #pragma vertex vert
            #pragma fragment frag

            #include "UnityCG.cginc"

            struct appdata
            {
                float4 vertex : POSITION;
                float2 uv : TEXCOORD0;
            };

            struct v2f
            {
                float2 uv : TEXCOORD0;
                float4 vertex : SV_POSITION;
            };

            sampler2D _MainTex;
            fixed4 _OutlineColor;
            float4 _MainTex_ST;

            v2f vert (appdata v)
            {
                v2f o;
                o.vertex = UnityObjectToClipPos(v.vertex);
                o.uv = TRANSFORM_TEX(v.uv, _MainTex);
                return o;
            }

            fixed4 frag (v2f i) : SV_Target
            {
                // sample the texture
                fixed4 col = tex2D(_MainTex, i.uv);
                //原始的alpha值
                float originalAlpha = col.a;

                float resA = 0;
                for(float x = -0.01;x <= 0.01;x += 0.01){
                    for(float y = -0.01;y <= 0.01;y += 0.01){
                        //if(x == 0 && y == 0)continue;
                        resA += tex2D(_MainTex, i.uv + float2(x, y)).a;
                    }
                }

                resA = step(0.05, saturate(resA));
                //原图中alpha为1的,让其变为0
                //原本是透明的alpha为0的,变为1
                resA *= (1 - originalAlpha);

                /*if(resA == 0){
                    return col;
                }else{
                    return _OutlineColor;
                }*/

                col = lerp(col, _OutlineColor, resA);//插值采样得到最后的颜色
                return col;
            }
            ENDCG
        }
    }
}
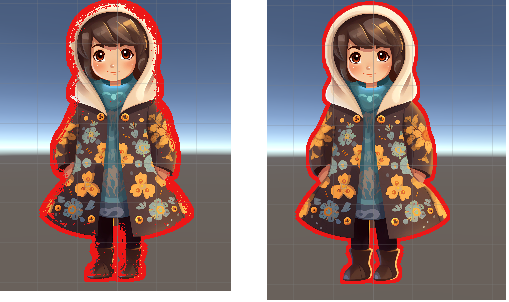
效果:

左边是没进行插值的,不够平滑,也就是使用了代码
if(resA == 0){
    return col;
}else{
    return _OutlineColor;
}
右边进行了插值,看着就平整一点,即使用了以下代码
col = lerp(col, _OutlineColor, resA);
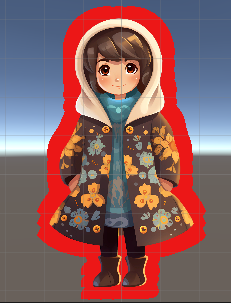
如果想要宽一点的线,就把采样的范围变大
for(float x = -0.04;x <= 0.04;x += 0.04){
    for(float y = -0.04;y <= 0.04;y += 0.04){
        resA += tex2D(_MainTex, i.uv + float2(x, y)).a;
    }
}
效果:

如果想要边缘更规整,那就把采样的精度加大,即把步长缩短
但是计算量也会变大。

